

In this tutorial, I would walk you through building a simple calculator with Html, CSS, and JavaScript. I decided to put this tutorial together because not everyone learns better by watching videos, so Here I'll break down things into simple steps to enable you follow through the whole tutorial.
TABLE OF CONTENT
Creating Our File StructureSetting up the HtmlAdding Css StylingHandling On Click Events With JavaScriptConclusion
#PREREQUISITES
- Have A Basic Understanding of Html Tables
- Have Basic Understanding Of Styling with CSS
- Must Have Begun A Little JavaScript, ( Not much Needed Though )
Creating Our File Structure
First, We Create a new folder on our computer. Let's name our new folder simple_calculaor. Next, we navigate to our new folder In any Way we can, ( using the command prompt? cd to the newly created folder) and open up the folder with our favorite code editor.
Here's what we need:
We need three (3) files:
index.htmlstyle.cssindex.js
Go ahead and create these three file inside your new folder.
Voila! That's the entire file structure needed for this application.
Setting Up The Html
First let's create a basic Html file structure:
<!DOCTYPE html>
<html lang="en">
<head>
    <meta charset="UTF-8">
    <meta name="viewport" content="width=device-width, initial-scale=1.0">
    <meta http-equiv="X-UA-Compatible" content="ie=edge">
    <title>Simple Calculator</title>
    <link rel="stylesheet" href="style.css">
</head>
<body>

</body>
</html>
As you've seen in the above code block, we gave our page a title, and we used the link tag to link our Html document to our CSS stylesheet. Next, let's add and script tag at the bottom of our body element to link our external JavaScript file (index.js) to our Html document.
...
<body>
    <script src="index.js"></script>
</body>
...
Okay, we are making progress!
Now, we would a create some div blocks, with a form and an input field which would serve a our calculator screen. Our elements have name attributes because we want to be able to refer to them later on with JavaScript. The div blocks would basically help us with styling, later in this tutorial. So inside the body tag, let's add this:
...
<div class="calculator-box">
    <div class="calculator">
        <form name="form">
            <input type="text" class="textview" name="textview"/>
        </form>
    </div>
</div>
...
Next, we want to create our calculator structure. There are several ways to acheive this, but for the sake of this tutorial, we would use the table element, dividing it into rows, to contain the different buttons of our calculator. In case you don't know about tables, I'll talk a little bit about it.
So Here is how a basic table structure looks like:
<table>
    <tr>
        <td></td>
    </tr>
</table>
where, tr stands for table row, and td stands for table data. A table table row could have multiple table data. So for our calculator, each row would contain multiple table data containing our calculator buttons buttons.
Right after our form, inside our div with the class calculator, we would construct our table. You'll notice I'll be adding class attributes to each of our buttons, this is because I want to be able to refer to them later on to style them. We also added onclick events whick we would handle in JavaScript later.
Here's our code for creating the table with the buttons we need:
<table>
    <tr>
        <td><input class="button red-btn" type="button" value="C" onclick="c()"/></td>
        <td><input class="button red-btn" type="button" value="<" onclick="back()"/></td>
        <td><input class="button op-btn" type="button" value="/" onclick="insert('/')"/></td>
        <td><input class="button op-btn" type="button" value="+" onclick="insert('+')"/></td>
    </tr>
    <tr>
        <td><input class="button" type="button" value="7" onclick="insert(7)"/></td>
        <td><input class="button" type="button" value="8" onclick="insert(8)"/></td>
        <td><input class="button" type="button" value="9" onclick="insert(9)"/></td>
        <td><input class="button op-btn" type="button" value="x" onclick="insert('*')"/></td>
    </tr>
    <tr>
        <td><input class="button" type="button" value="4" onclick="insert(4)"/></td>
        <td><input class="button" type="button" value="5" onclick="insert(5)"/></td>
        <td><input class="button" type="button" value="6" onclick="insert(6)"/></td>
        <td><input class="button op-btn" type="button" value="-" onclick="insert('-')"/></td>
    </tr>
    <tr>
        <td><input class="button" type="button" value="1" onclick="insert(1)"/></td>
        <td><input class="button" type="button" value="2" onclick="insert(2)"/></td>
        <td><input class="button" type="button" value="3" onclick="insert(3)"/></td>
        <td><input class="button eq-btn" type="button" value="=" onclick="equal()"/></td>
    </tr>
    <tr>
        <td><input class="button" width="106px" type="button" value="0" onclick="insert(0)"/></td>
        <td><input class="button" type="button" value="." onclick="insert('.')"/></td>
    </tr>
</table>
With this, we are pretty much done setting up the the Html
Adding CSS Styling
Remember all those classes we added in our Html code? Let's go ahead and use them now ( I was actually looking for a funny quote to insert here but nothing came to mind, I'll probably update this aricle later 😅, or not).
Moving forwrd, we want to style the buttons, center the calculator on the page, and add colors to respective buttons based on their functions. I wouldn't go in details explaining the CSS as I believe you already know most of the stuff there and by reading the code you would figure the rest out.
Inside our style.css file, paste this:
*{
    margin: 0;
    padding: 0;
}
body{
    width: 100%;
    height: 100%;
}
.calculator{
    background-color: rgb(54, 54, 54);
    position: absolute;
    top: 50%;
    left: 50%;
    transform: translateX(-50%)translateY(-50%);
}
.calculator-box{
    width: 100%;
}
.button{
    width: 90px;
    height: 90px;
    font-size: 25px;
    margin: 2px;
    padding: 5px;
    border: none;
}
.red-btn{
    background-color: red;;
}
.eq-btn{
    background-color: green;
}
.op-btn{
    background-color: orangered;
}
.textview{
    width: 360px;
    height: 60px;
    margin: 5px;
    font-size: 25px;
    padding: 5px;
}
.footer{
    position: absolute;
    bottom: 0;
    padding-left: 15px;
    padding-bottom: 10px;
    font-size: 20px;
}
At this point, here is what our calculator should look like:
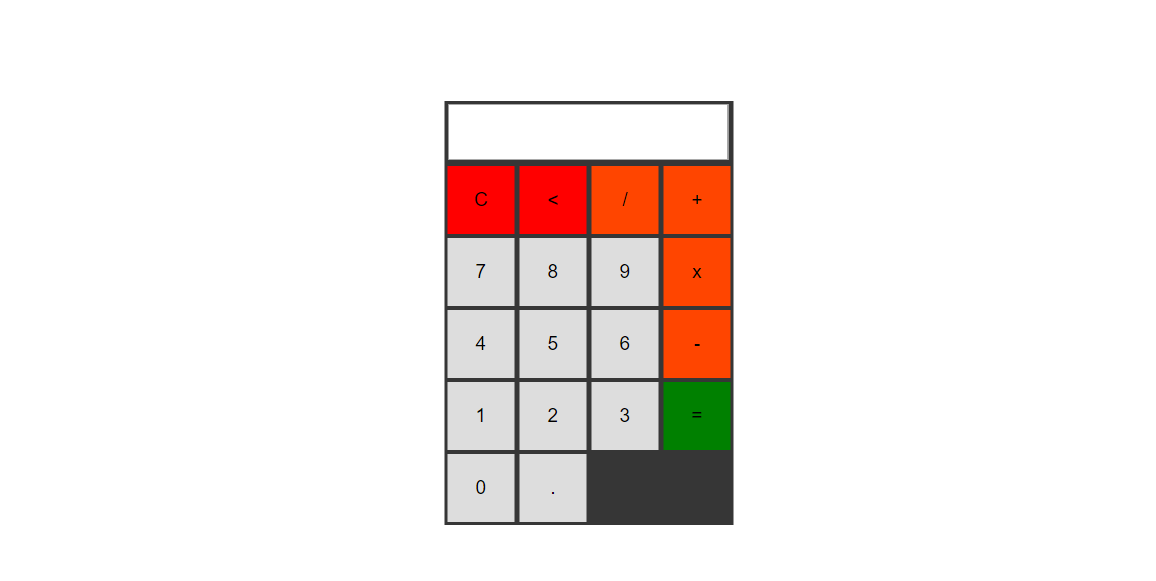 Cool, right?
Next, we add the JavaScript functionalities to enable us interact with the calculator.
Handling On Click Events With JavaScript
If you recall, we added onclick events our different buttons. Here are the different functions we called in the onclick events
insert(value)clean()back()equal()
We would now create these functions in JavaScript so that the get executed onclick of the respective buttons they are declared on.
Go to index.js file, and let the coding begin!
insert(value)
We call this function on every numeric button, operation buttons( +, -, /, *), in the calculator. This function simply takes the value of what is clicked upon and displays it on the screen. Let's write the function:
function insert(num){
    document.form.textview.value = document.form.textview.value+num
}
We targetted form element in our Html, and if you look closely at our input field for the screen in the form element, we gave it a name of textview, here, we use that name to uniquely identify the input field and set it equal to itself plus the new number that was added in our function call. Try to look over everything again and you'll get it.
clean()
The next function we would write would be to clear the screen when the button labellec C is clicked on.
function clean() {
    document.form.textview.value = ''
}
so here, again, we target our screen input field and set it to an empty string, and as such, everything would be cleared from the screen. (it seems like clear is a required keyword in JavsScript, so don't rename your function t
back()
Now, sometimes you might not want to clear the entire screen, but clear just a single value. Let's write the function to do that:
function back(){
    let exp = document.form.textview.value
    document.form.textview.value = exp.substring(0, exp.length - 1)
}
So, we again got the value in the screen already, this time we stored it in a variable exp,after this we set the screen's value to check the substring and remove one from it's length (this is leterally the most complex function in the whole article, but it's quite easy once you look carefully).
Finally, we would need to calculate the value on the screen and display an answer when the equal to button is clicked.
equal()
Here, we write a function that evaluates the entire thing on the calculator screen, and gives a result.
function equal() {
    let exp = document.form.textview.value
    if(exp) {
        document.form.textview.value = eval(exp)
    }
}
Here's what we just did:
We got the value on the screen already and stored it in a variable caled exp.
Next, we use an if conditional statement, this is to check if there is a value on the screen already, because we don't want this to run when there's no value on the screen already. So if there is value on the screen, we tell the screen to display the result of the evaluated calculation using the eval() function call. The eval() function call takes in the value on screen and evaluates it.
Conclusion
We have come to the end of this tutorial, Now we have a functioning calculator that could add, devide, substract, and multiply, clear screen, etc.
Do you have questions? Or do you have a tutorial you'll love to see? Leave a comment, or send me a message on twitter.
Here's a link to the github repository for this project.
- https://github.com/Chiagozielam/Simple-Calcuator
Don't forget to follow me on twitter@spillcodefor more awesomeness